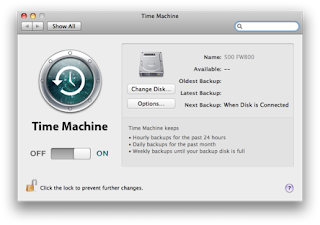
It took a long time to bring all the data back, about 5 hours in the end. TimeMachine did an excellent job, but with one or two minor problems: it doesn't actually back up everything. In this case it didn't back up the Logs folder from the user account, which I needed for tracking remote support. I'll create an Automator script to send that to my DropBox account.
Also after a complete restoration of the data to the reformatted main drive, the hard drive wouldn't boot without reinstalling 10.6. After the reinstallation was complete, everything was back as it should have been, except for the logs folder.
I think it would be best to use Carbon Copy Cloner as well as Time Machine to have a sturdy backup system. TimeMachine is great for background backup and retrieval of damaged, lost or altered files. The fastest way to get back up and running though would be to have a continuous clone made of the whole drive, which Carbon Copy Cloner can do as a regular daily or hourly task. If this is stored on a FireWire drive then any Mac from G4 onwards can boot from it. If you use a USB drive though, only Intel Macs can boot from that. CCC warns you of this as you set up the clone process.
Tuesday, 29 March 2011
Monday, 28 March 2011
Data lost, but thank goodness for TimeMachine
Yesterday I wanted to add another partition to my Mac’s boot drive. OS X Disk Utility can do this without losing existing partitions, in both 10.5 and 10.6; no need to hive off the data and reformat first.
However, in this instance, Disk Utility wasn't that keen to do it mainly because the small amount of free space was so fragmented. So I updated my two TimeMachine backups and then ran Drive Genius 2 which seemed quite happy to defragment the drive. I left it running overnight.
In the morning the Mac had an error on the screen telling me the main hard drive was damaged! Looks like Drive Genius wasn't that great after all, it would have been nice if it had flagged up that there might be a problem.
Thank goodness that I had followed my own preaching and used TimeMachine to look after my backups. I had taken the precaution of using two different TimeMachine backups to two different drives, so that if one drive were to fail at any time I would have another backup.
I use DropBox to sync important data between my Macs, so I know all the data there was safe—Dropbox data also gets backed up by TimeMachine, which makes it better than iDisk. Its data is also both remote and local, rather than being online only.
Slightly nervous time while I waited for the restore to take place.
Everything (though see newer post) arrived back just as it had been before yesterday's calamity. I dread to think where I would have even started to try and get all the data back. Lots of it had no great value but interspersed among all the bits and pieces were a variety of important documents which I could really do with keeping!
Read more: Why should I bother backing up?
Thursday, 24 March 2011
"Send Again" option disappeared in Outlook for Mac 2011?
An annoyance in Outlook 2011 for Mac is the omission of the option to re-send an email. All is not lost—visit this page for an excellent solution
Barry says: "This restores the ‘resend’ function that was in Entourage, but didn’t make it to Outlook at first release. When run with a sent message selected or already open, it will create a complete copy of that message that can be sent again. The copy will have all the original recipients, attachments and the original account."
Make Safari run in full screen
Apple's Safari web browser doesn't normally fill the screen, and clicking the maximise button doesn't do it either. However, if you drag this "bookmarklet" to the bookmarks bar, it will switch Safari to run full-screen when you click it.
Drag this to the Bookmarks Bar Full Screen
Another more tedious way to have Safari run full screen when you open a new window: open a new window with Command-N, resize that window to full size by dragging its bottom-right corner. Then close the window. After that, new windows will open full-size.
Drag this to the Bookmarks Bar Full Screen
Another more tedious way to have Safari run full screen when you open a new window: open a new window with Command-N, resize that window to full size by dragging its bottom-right corner. Then close the window. After that, new windows will open full-size.
Gmail Bookmarklet: easily send email with Gmail
To be able to easily send a link to the current webpage with your Gmail account drag this to your Bookmarks bar. Then click it when you are on a webpage that you want to send to someone.
Drag this to your bookmarks bar Gmail this
Friday, 18 March 2011
Anti Features
Anti-features are sold to customers as features but are fundamental or unavoidable aspects of systems that can only be removed or withheld through technological effort. Unlike real features, producers of anti-features charge customers for not inhibiting access to their products' full functionality. Technological and legal barriers that keep anti-features away from the users of intentionally less featureful end up costing all users their freedom. It is more difficult for Canon to make cameras that output JPEGs than cameras that output RAW, and it's not significantly more difficult to offer users a choice.
Listen to this clip from Anti Features podcast by Benjamin Mako Hill
Read More about Anti features and the RAW file format...
Listen to this clip from Anti Features podcast by Benjamin Mako Hill
Read More about Anti features and the RAW file format...
Thursday, 17 March 2011
Using Bonjour to find and configure laser and inkjet printers
To see what devices are showing over Bonjour (Apple's zero-config networking), enable Bonjour in Safari's Bookmarks: Safari > Preferences > Bookmarks > Bookmarks Bar > Include Bonjour.
MacBook and Network inkjet HP C5180
Interesting one the other day, a Macbook running 10.5.8 that would not 'see' a HP C5180 inkjet on the Airport wireless network. Worked fine over USB, but the installation software would not see the printer over the wireless network at all.
I connected it in by Ethernet, when of course it was seen, so I thought that it would disappear again as soon as I disconnected Ethernet. Well curiously it worked perfectly over wireless after that, being found as normal by all the software.
24 March update on this: it disappeared again off Bonjour, never figured out why; but I set up permanently by assigning it a manual IP address and then using the IP option in Add Printer to add its IP address.
Wednesday, 16 March 2011
Get your Backup!
I have been finding recently that many of my Mac clients aren't bothering to back up their data. If you realised just how precariously your information is saved on a hard drive, you would be much better about having a copy of that data elsewhere!
Any Mac bought in the past 3 years or so—they will have OSX 10.5 Leopard or OSX 10.6 Snow Leopard—has TimeMachine automatic backup built-in. You simply plug in a new drive like this one for example, and the Mac will ask if you want to use if for backup. Click Use for Backup, and if necessary TimeMachine will reformat it. After that everything is automatically backed up. The first backup will take a while as the whole hard drive is backed up. After that it simply updates itself every hour.
More info on backing up at this link:
Essex Mac Support | Backup: why should I bother?
Mac Tip: Drag-and-Drop Printing
Works in 10.5 and 10.6: To print a document, you don't need to open the application first. Just drag the document onto the printer icon and it will print straight out of the printer. Sometimes the relevant application will open and automatically print, other times it simply prints instantly (PDF, JPG and maybe others).
Haven't got an icon for the printer? Each time you print, the printer icon will temporarily appear on the Dock. When it does so, drag the icon to the left to have it stay in the Dock. From then on the tip above will work.
Subscribe to:
Posts (Atom)